Lead in Drinking Water: Guide for Toronto, Halton and Peel Region
Until recently, you might’ve thought that lead pipes were a thing of the past. But a recent investigation by Global News and The Toronto Star has served as a wake-up call to the fact that lead is still a very real concern here in the Greater Toronto Area.
The truth is, there are nearly 26,000 city-owned lead water pipes still underground in Toronto. There are even more lead pipes in service on private properties in Toronto, Oakville, Mississauga and the surrounding regions.
You want to make sure your family’s water is safe. As certified plumbers, we have received a lot of calls about this in recent days. We want to help you by providing concrete information on this issue as it pertains to homeowners in the Region of Halton, Peel Region and the City of Toronto.
In this guide, we’ll discuss:
- Why people are suddenly talking about lead in drinking water
- How and why water becomes contaminated with lead in the first place
- What constitutes an unsafe level of lead in drinking water
- How to find out if there is lead in your home’s drinking water
- What you can do to protect yourself and your family
We will also provide links to sources with more information at the end of this article.
Why Is Lead-Contaminated Drinking Water Back In the News?
Until 1975, lead was commonly used as a material for plumbing pipes. Lead was also present in solder used to join pipes together until 1986, and could be found in faucets and plumbing fixtures and hardware as recently as 2014.
Although lead water pipes have been banned in Canada since the mid-70s, many thousands of lead pipes remain in service to this day. Fixtures and solder containing lead are also present in homes, schools and other buildings.
Recently, a group of Canadian journalists published the results of a Canada-wide investigation into the concentration of lead found in our drinking water. This has served as a wake-up call on the prevalence of lead in Ontario schools and daycares, one third of which tested for higher-than-recommended levels of lead.
The reports have also sparked renewed concerns about the possibility of lead turning up in the water we drink every day at home.
How Does Lead Get Into Drinking Water?
In Canada, lead rarely enters the water at its natural source (which in our region is Lake Ontario) or at a water treatment plant. In most cases, water becomes contaminated at some point between the water treatment and the tap due to aging lead pipes.
Like any metal, lead is prone to corrosion. When pipes and other plumbing materials containing lead begin to corrode, water can become contaminated with dissolved lead.
Lead can enter drinking water at various points between the treatment plant and the tap. It can seep in from a city-owned water supply line, a water line on private property, solder in a joint between pipes, a water valve, or a fixture like a faucet or drinking fountain.
The risk of lead contamination depends on many factors, including:
- How long water stays in the pipe (stagnant water has longer exposure)
- Temperature of the water (warm water is more corrosive than cold water)
- Amount of lead in the pipe or fixture (whether they are ‘pure’ lead materials)
- Water chemistry (soft water is more corrosive than hard water)
- Types and amounts of minerals in the water
What Is Considered an Unsafe Amount of Lead?
Lead levels in drinking water are measured based on the amount of lead (in milligrams) found in a one-litre water sample.
On March 25, 2019, Health Canada updated the federal guideline for lead in drinking water from 0.010 mg/L to 0.005 mg/L, reducing the acceptable concentration of lead in half.
As of November 2019, the guidelines in Ontario have not been brought in line with the federal guidelines. In Ontario, a concentration of 0.010 mg/L is still considered acceptable.
However. Health Canada and the CDC agree that there is no “safe” level of lead when it comes to babies, children and developing fetuses. Lead exposure, even at low levels, can interfere with brain development.
How Can I Find Out If There is Lead in My Home’s Water?
Houses built before 1975 are at a higher risk of lead contamination because they are more likely to have lead plumbing. If your home is 50 years old or more, it is also possible that the water supply line from the city to your home is made of lead.
Houses built as late as 1986 could also be exposed to lead through lead-based solder used in water pipes. Additionally, any metal plumbing fixtures installed in Canada before 2014 could contain as much as 8% lead.
To find out if your drinking water contains unsafe concentrations of lead:
1. Contact a Licensed and Certified Plumber
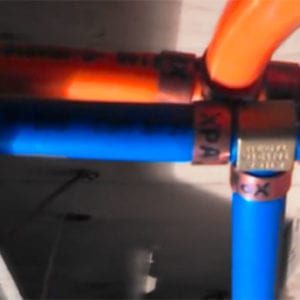
The most efficient and accurate way to get answers about your home’s drinking water. A licensed and certified plumber can inspect your plumbing system for lead and offer a variety of solutions if your home is discovered to have lead pipes.
2. Inspect Your Pipes
Lead pipes are not easy to spot at first glance if you don’t have much experience with plumbing. However, there are a few things you can do to try and determine if a specific pipe is made of lead:
- Lead is non-ferrous, so pure lead pipes will not attract a magnet.
- Lead is easy to scratch with a knife or key.
- Lead is a dull grey colour, but fresh scratches will appear silvery.
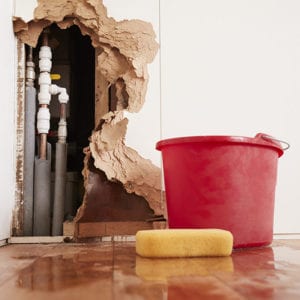
Keep in mind that the majority of your home’s plumbing system is ‘invisible’ − hidden behind walls, beneath floorboards and under the ground. Just because you cannot see any lead pipes doesn’t mean they aren’t there.
3. Have Your Water Tested
An accredited laboratory that is licensed to test for lead can test a sample of your water for a fee.
Depending on where you live and the age of your house, you may also be eligible for free water testing through your regional government.
- Toronto: If your home was built before the mid-1950s, you can submit a water sample to the City for free testing
- Mississauga, Brampton and Caledon: You can call or email the Region to request a free lead water test.
- Oakville, Milton and Halton Hills: If your home was built before 1990, you can ask Halton Region to test for lead levels from your indoor tap for free.
If you’re worried about your drinking water, we recommend installing a reverse osmosis filtration system. It removes 99% of all common chemical contaminants, bacteria and sediment. You’ll be prepared for any drinking water issue that comes to light.
How Can I Protect My Family from Lead?
We understand how stressful it is to question whether your water is safe to drink. Here are several concrete solutions you can take immediately, in the near future, and in the long term to protect your family.
What To Do Right Now
- Do NOT boil water before drinking it if you suspect it contains lead. Because water evaporates during boiling, this actually increase the concentration of lead in the water.
- If water has not been used for several hours, run each tap until it becomes colder (for 30 seconds to 2 minutes) before drinking or cooking. This flushes the line and can reduce the concentration of lead by up to 90%.
- If you have a baby who is on formula, use ready-to-drink formula instead of formula that must be prepared with water.
What To Do Next
- Have a licensed and certified plumber inspect your plumbing system.
- Submit a sample of your tap water for lead testing.
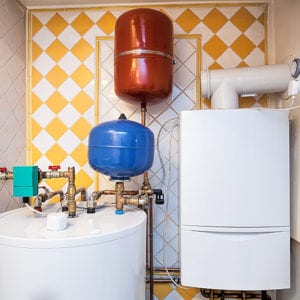
- Consider having a plumber install a reverse osmosis water filtration system. A reverse osmosis filter is highly effective in removing lead, as well as bacteria, viruses and sediment.
What To Do Eventually
- Have any lead pipes or fixtures containing lead removed and replaced. Although a reverse osmosis filter can ensure that your water is safe according to Health Canada’s guidelines, repiping is the only way to guarantee that all sources of lead are removed from your water supply.
More Information
To book a same-day or next-day plumbing inspection for your home in the Greater Toronto Area, call (905) 829-1296 or get in touch online. Our plumbing technicians can quickly determine whether your home’s plumbing system is safe.
We can also install a reverse osmosis filtration system, which removes traces of lead and 99% of all common chemical contaminants, bacteria and sediment from your drinking water. With a reverse osmosis system, you can rest assured that your family is safe from exposure to lead from household plumbing or city-owned water lines.
For more information about lead contamination in drinking water:
- Guidelines for Canadian Drinking Water (Health Canada)
- General Information about Lead in Drinking Water (EPA)
- List of laboratories licensed to test water for lead in Ontario
To find out if you are eligible to have your water tested for free by the City or Region:
- Free water testing in Toronto
- Free water testing in Mississauga, Brampton and Caledon
- Free water testing in Oakville, Milton and Halton Hills